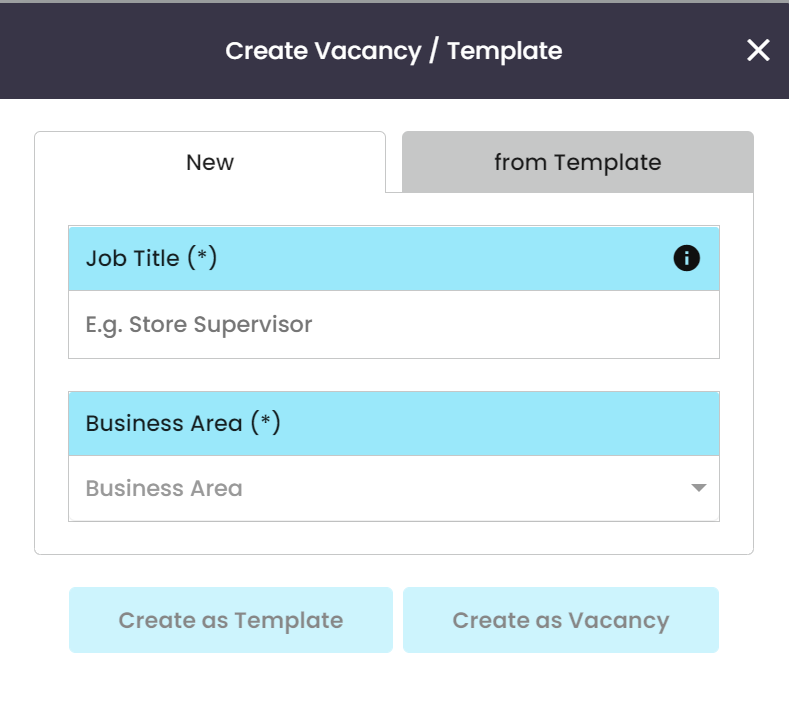
GeniusATS offers functionality to users to create a vacancy from ‘New’ or to create a ‘Vacancy Template’ which is stored in the Vacancy Templates section for future use and offers the ability for you to lock down fields so that other users cannot alter the information when raising a vacancy.
INFO:
- Only control panel users with the correct permission can create either a [New] vacancy or a vacancy from a [Template].
- All mandatory fields require completion before a vacancy can be launched.
- Vacancy information can be [saved] and edited only when creating a template, you can find this under [Draft] Vacancies
Create New
Creating a vacancy or a template allows the user to set the standard information for the vacancy as well as manage the ownership, the approval process for launching the vacancy and people associated with the interview process.
A Template tends to have toggles locking fields so certain users (who don’t have the permission to edit) can’t change the required set information.
The Vacancy template is split into sections:
- Details*
- Application Form*
- Workflow*
- Job Description*
- Questions
- Advertising*
- Agencies
- Interviews
- AI
All mandatory* sections need configuring BEFORE a vacancy can be launched
Field Limitations:
- Title limited to 100 characters
- Internal Title limited to 100 characters
- Code limited to 50 characters
- Salary Description limited to 100 characters
Vacancy Controls
When creating a new vacancy all fields will be blank ready for the user to populate. When the user has completed all sections, click the three dots next to the vacancy title to manage what happens with the vacancy.
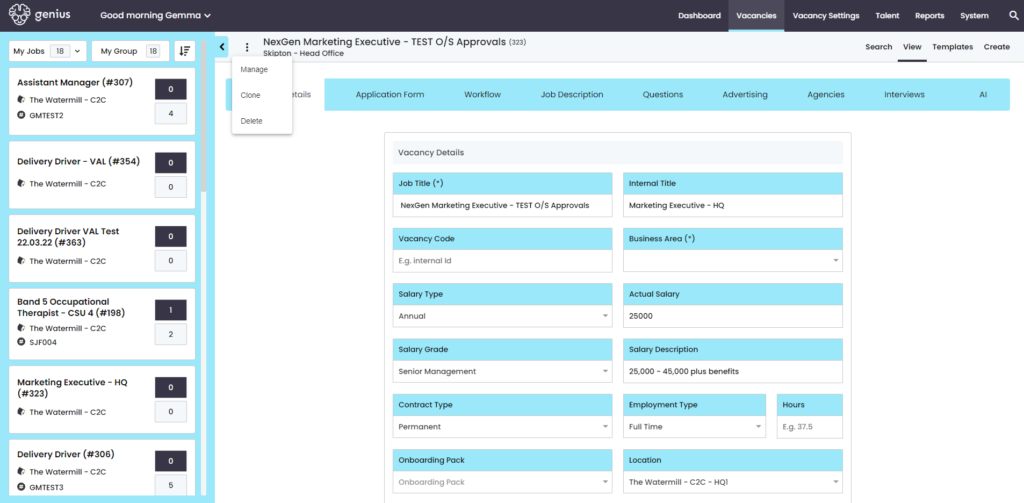
- Manage – Takes you to vacancy applications
- Clone – Clones the template
- Delete – Deletes the vacancy
- Launch – Invokes the approval process (if applicable) or launches to the candidate facing website, agency and Job Boards based on the advertisement dates in the template
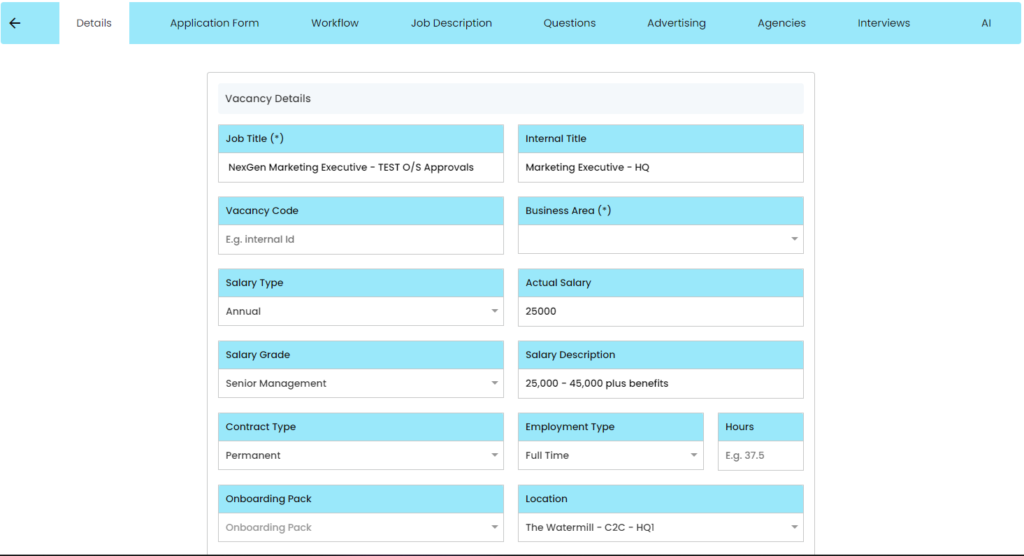
Vacancy Details
This section provides the standard information about the role, such as; Vacancy Title, Salary, Location.
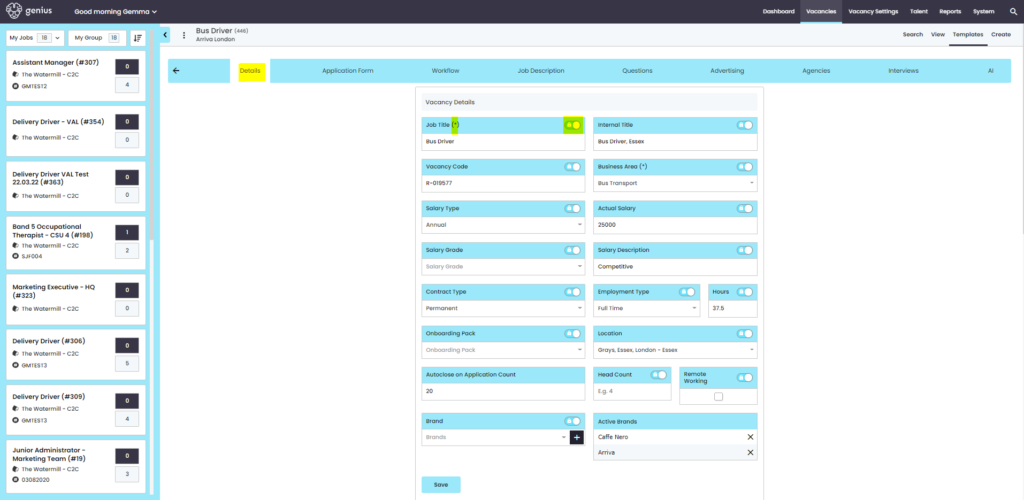
- Job Title
- Internal Title
- Vacancy Code
- Business Area
- Dropdown – pulling data from ‘Locations’ area
- Salary Type
- Annual
- Hourly
- Actual Salary
- Salary Grade
- Salary Description
- Contract Type
- Permanent
- Temporary
- Apprenticeship
- Fixed Term
- Employment Type
- Full Time
- Part Time
- Onboarding Pack
- Dropdown – Pulls data from ‘Onboarding Packs’ area
- Location
- Dropdown – pulling data from ‘Locations’ area
- Autoclose on Application Count
- Head Count
- Brand
- Dropdown – pulling data from ‘Brands’ area
- Remote Working
Stakeholders
This section assigns the controls for raising, authorising and managing the vacancy.
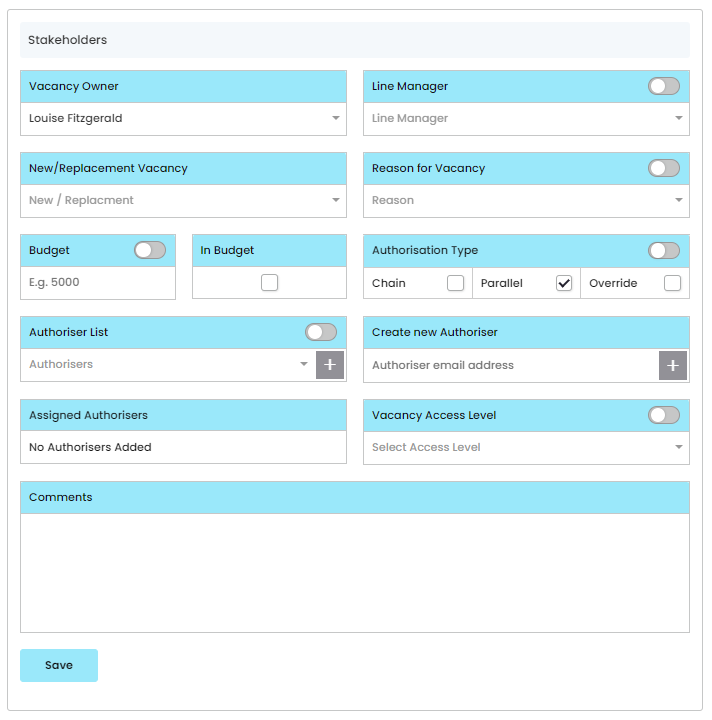
- Vacancy Owner
- Dropdown list of control panel users
- Line Manager
- Dropdown list of control panel users
- New/Replacement Vacancy
- New Role
- Replacement
- Reason for Vacancy
- Leaver
- Long Term Sick
- New Position
- New Post
- Secondment
- Restructure
- New Store Opening
- Change of hours
- Maternity
- Budget
- In Budget
- Authorisation Type
- Chain (1 > 2 > 3 > Approved)
- Parallel (Approved in any order but once all approved is launched)
- Authorisation Override
- Authorisation Override Reason
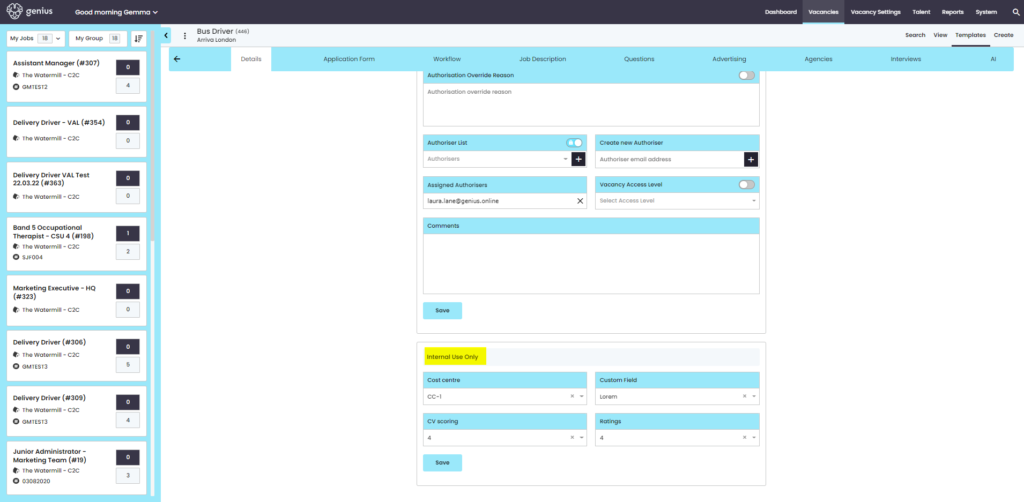
- Authoriser List
- Create New Authoriser
- Vacancy Access Level (managed via the user permissions allowing users to only see vacancies at and below a pre-set level)
- Comments
Internal Use Only (optional)
Here are customisable dropdowns (you can have as many as you want), which each client can populate to customise management information about the vacancy. This works really well for specific reporting.