Each vacancy has a ‘workflow’ associated to it which is displayed in the vacancy in columns.
Each application can be moved through the workflow by
- drag and drop
- by clicking into a candidates application details and updating the status
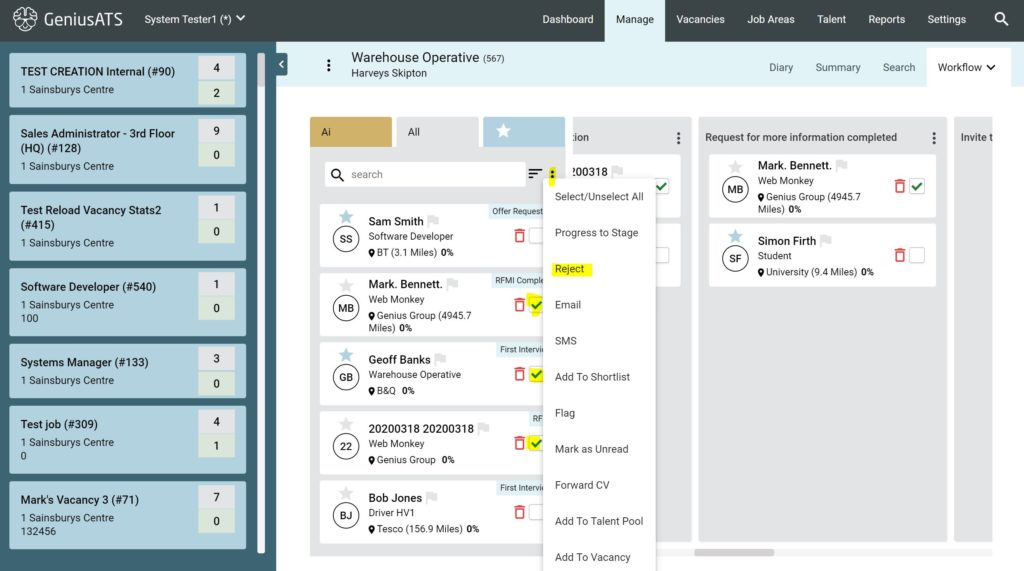
- Bulk changes – selecting multiple candidates to progress
Drag & Drop
Click on the candidate you wish to progress and hold the mouse button, then move the card across the screen and release it in the correct column.

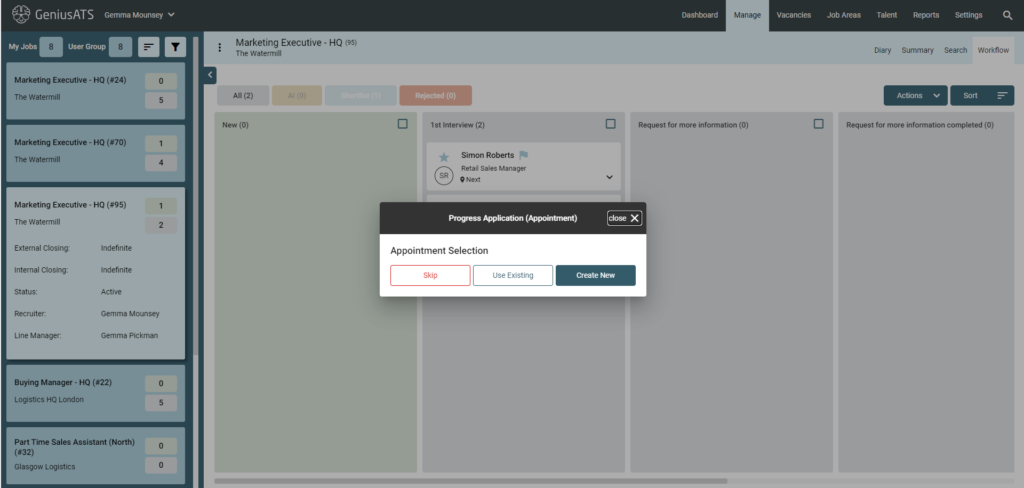
Pop ups / Actions
Some of these columns with have ‘actions’ associated with them to help you progress the candidate through the recruitment process.
Example:
Create appointment for First Interview
Here you have three options to create an appointment (or First Interview) for the candidate
- Skip – allows the user to move the candidate but not create an appointment
- Use Existing Appointment – adds the candidate to an existing appointment
- Create New – Creates a new appointment
Skip Appointment
No further actions are taken
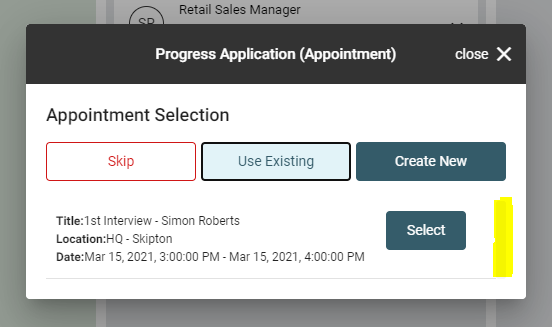
Use Existing Appointment
Choose which appointment you wish to add the candidate into
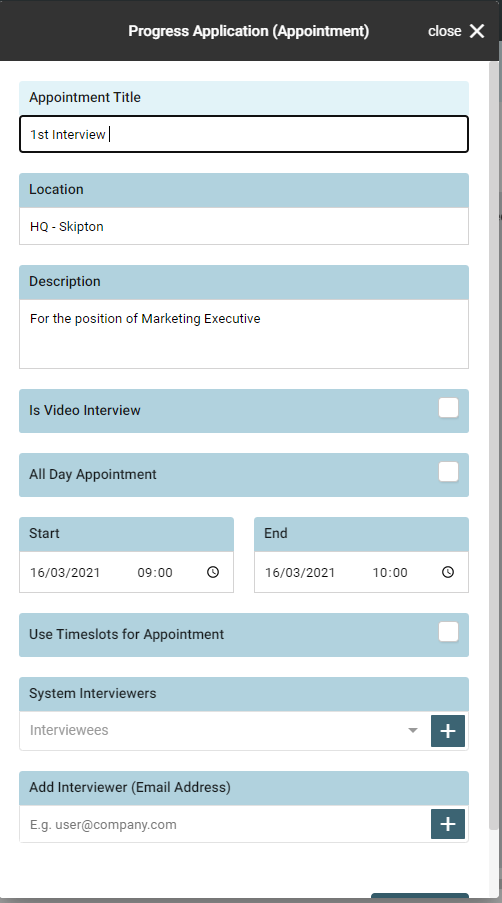
Create New Appointment
Create a new appointment using the options on the pop up. You will see some information is pre-populated – you can add to this information so the appointment information is clear in the diary. E.g. 1st Interview – “Gemma Thompson”
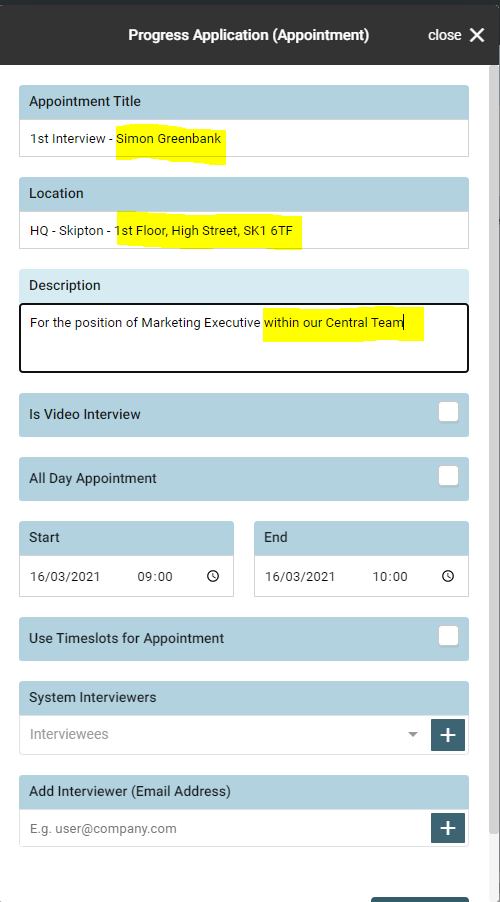
Additional Info
Original
Interview Type
Choose the ‘type’ of interview from the options:
- Video Interview
- All Day Appointment
- Bespoke (Start – End days/time)
- Use Timeslots for Appointments
Add Interviewers
- System Interview(s) – This is a list of system Users in the Genius ATS control Panel
- Add Interviewer (Email Address) – This is someone that is not a Genius ATS control panel user
Choose Email Template
A standard email template is usually associated with this workflow stage, but you have the option to select a different template or freetype over the template
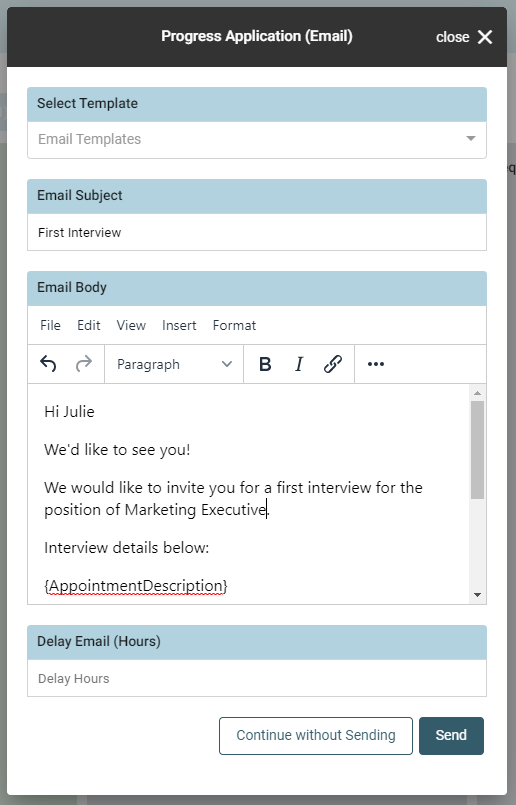
NOTE: Any words that have the {brackets} have been added to pull through specific information about the application, appointment or candidate.
Click on [Continue without sending] if you do not wish to confirm the appointment digitally
or
Click on [send] to send the communication to the candidate and any interviewer(s)
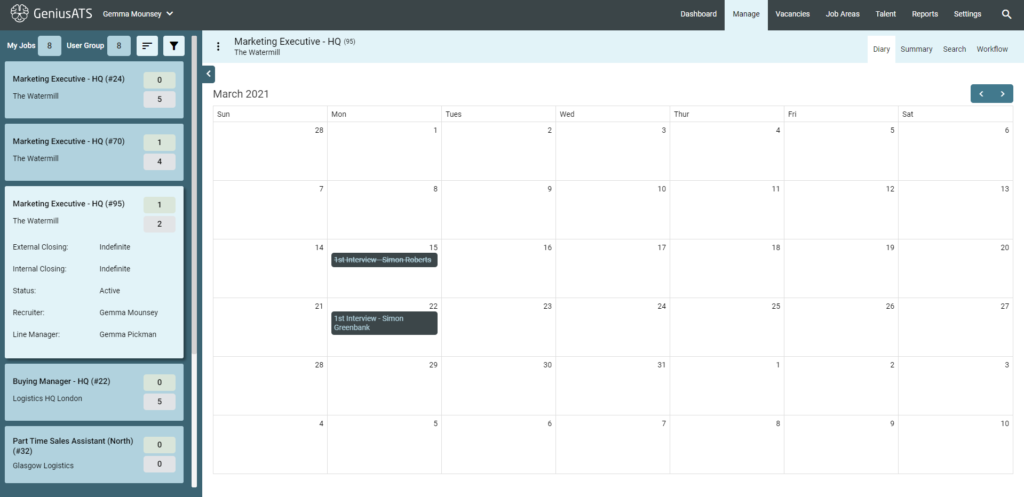
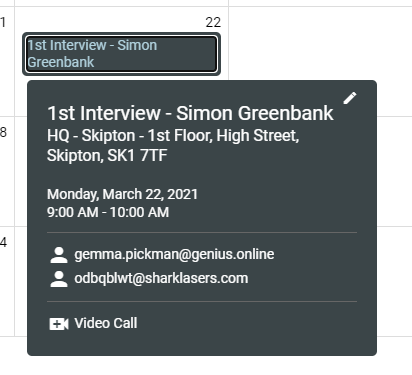
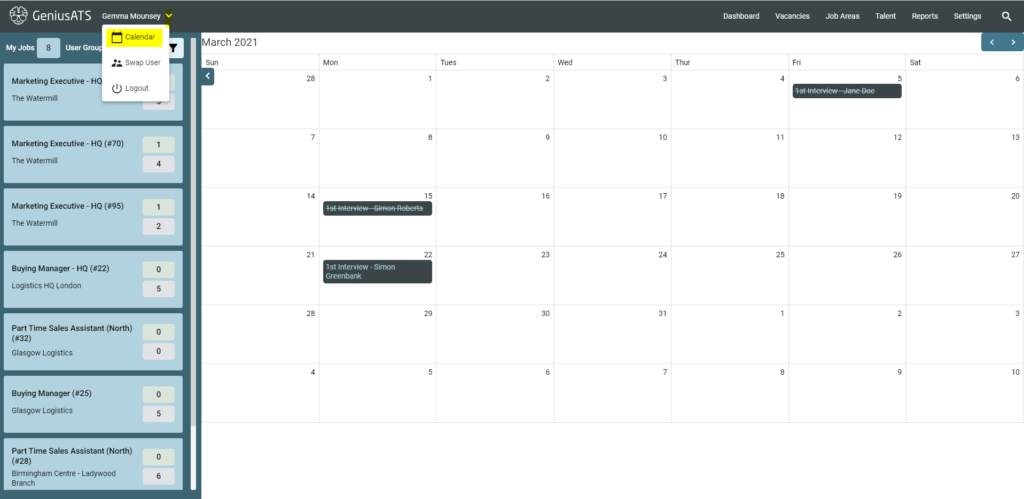
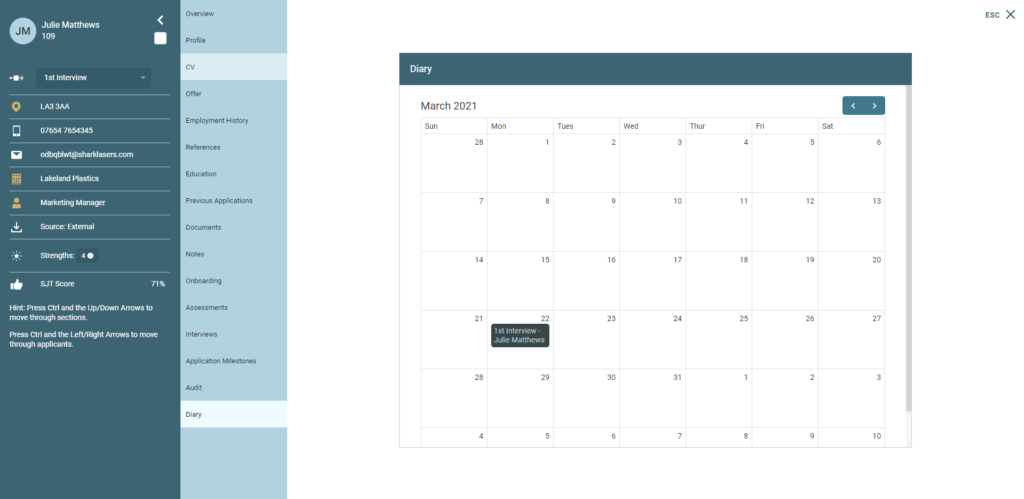
You will now see the appointment in:
- the Vacancy Diary
- System Calendar
- Candidate Diary
Vacancy Diary
Vacancy Diary – Click on appointment
System Calendar
Candidate Diary
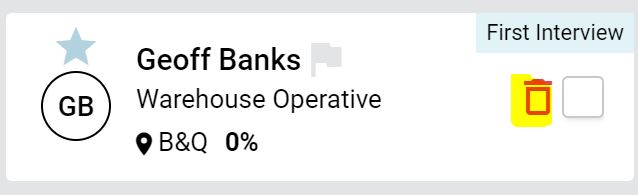
Reject /Decline Candidate Applications
Candidates can also be rejected at any stage of the process by either;
- clicking on the Bin icon against a candidate
- Clicking the tick box on several candidates, clicking the [action] button at the top of the column and bulk [reject] candidate(s)